
A few weeks back we told you of a hobby we both enjoy and do – Collecting and making Models/Figures, now we want to share more about it, namely the building and painting side of that past-time.
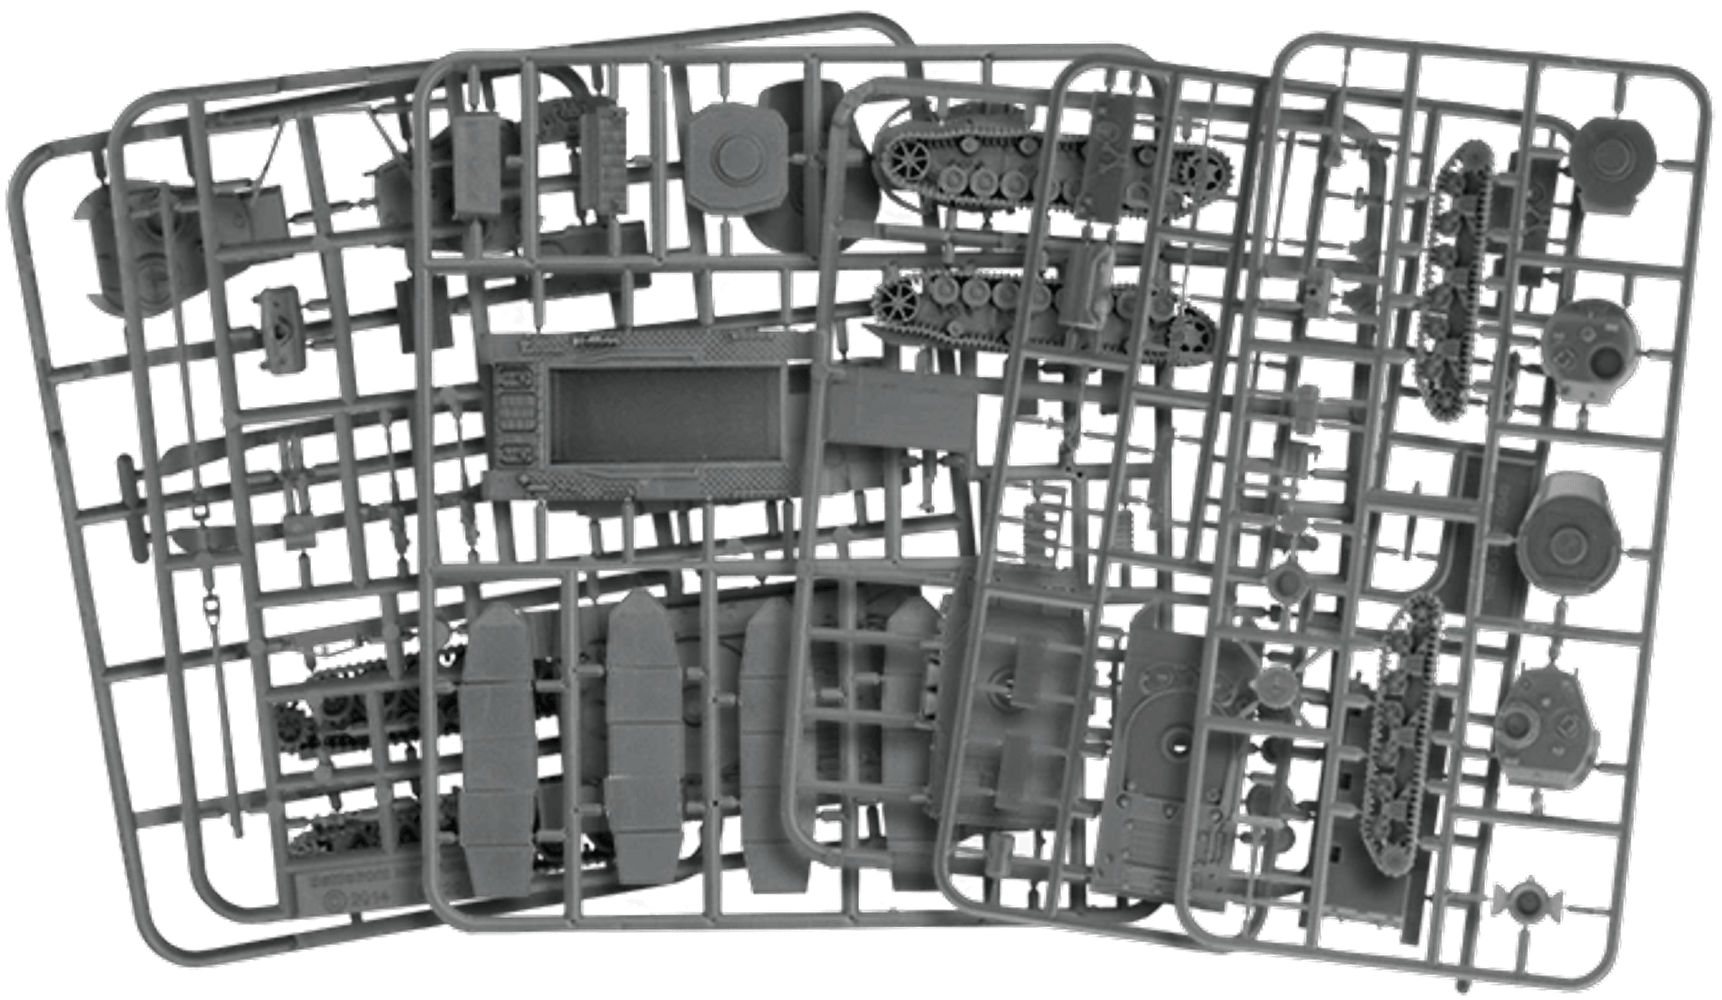
So, you’ve finally got your figure from far away, through the post and taken it out of the box, popped all the pieces from the sprues and are ready to put it together and just paint it, right?
Wrong!
First you may have to sand away the marks where it was attached to those Sprues, sand off rough edges and make it fit nicely. Then you have to fill gaps in the moulds, cut down the ‘pimples’ where the 3D printing Supports were or from having to twist and repose the figure to fit together due to warping. You might want to adjust the pose a bit or even ‘Kit Bash’ it (that’s joining parts of different models together to make something unique) Or even sand it down to make it more realistic.
For example, one figure of St. Louis Blue from the game Azur Lane – came with the most GIGANTIC BOOBS you have ever seen and it was just weird! So Ash dismantled the torso and spent an afternoon with some 70grit sandpaper sanding down her figure before cutting and sculpting her costume to fit the new lighter DD cup bust instead of her original ridiculous Double M love pillows!!

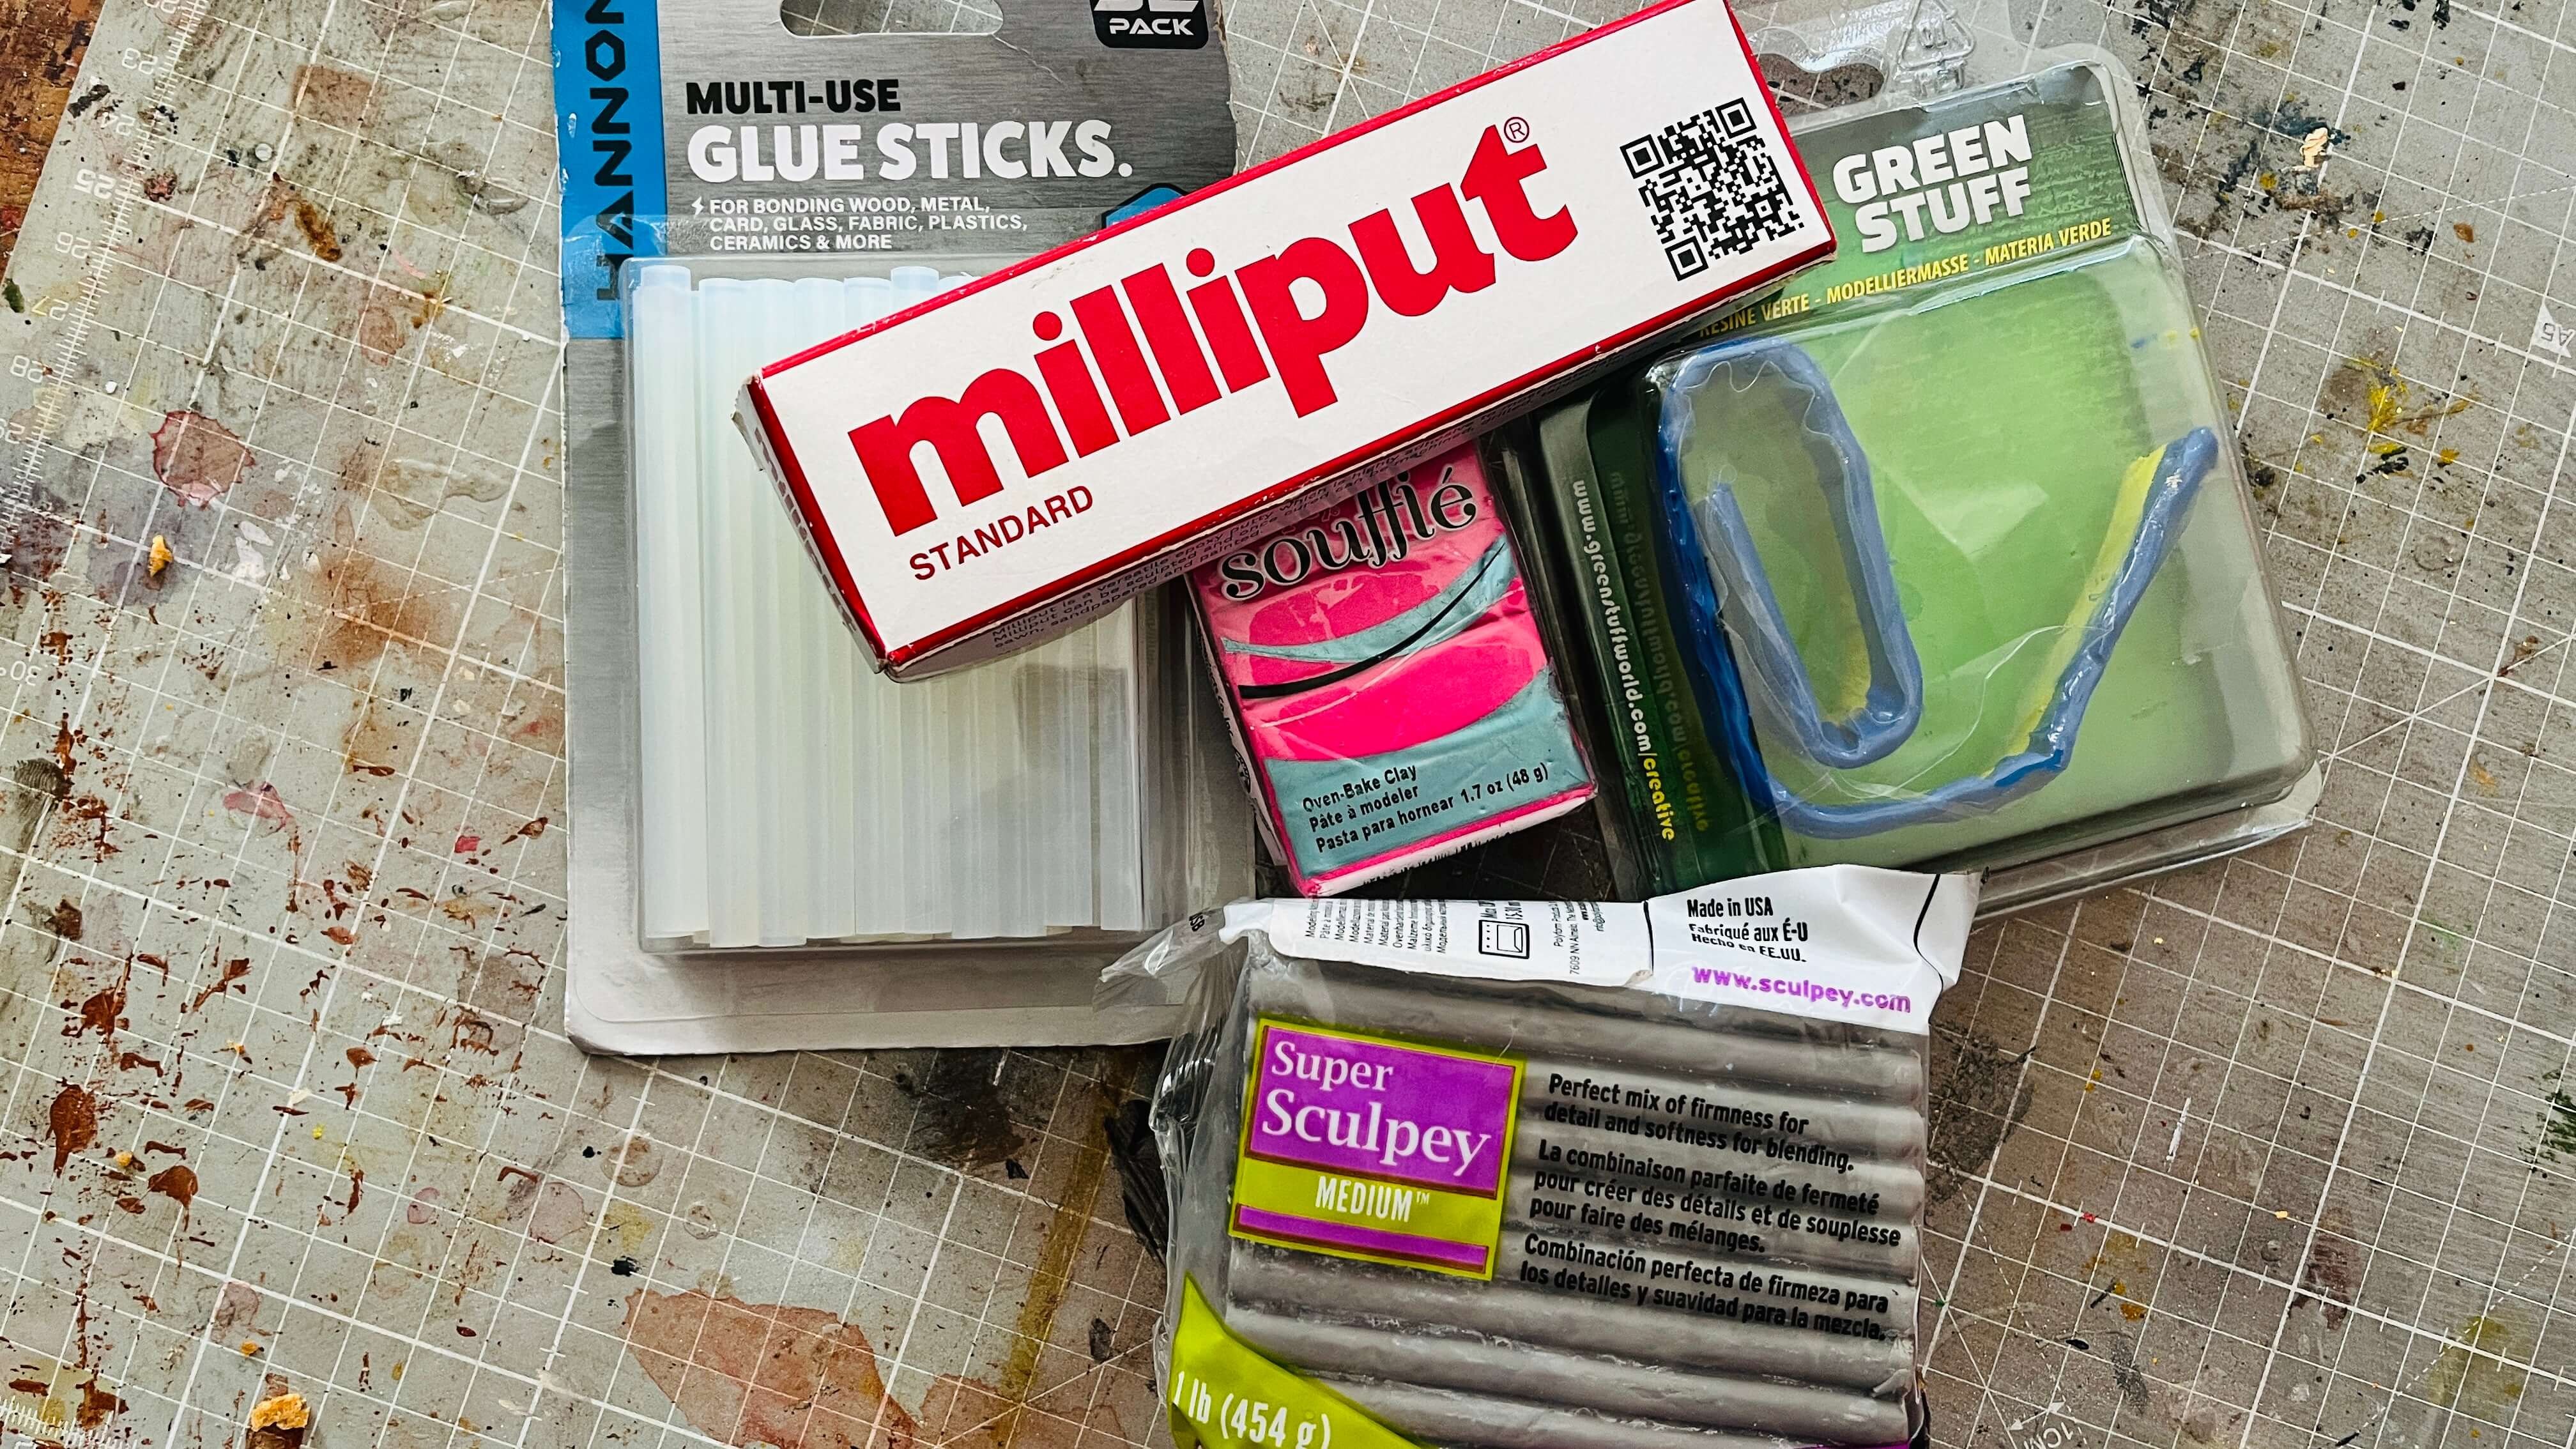
If you add your own flare – give them a better sword or add a skirt to your French Maid figure (because she didn’t come with one!) you do this with one of a variety of model making Epoxy Resins, namely Green Stuff, Milliput or Sculpey, these each have different properties and benefits. Green Stuff is a 2 part putty, that is great for small details. Milliput is similar but better for bigger areas as it’s a lot more crumbly. Sculpey is more like clay, it’s moldable and can be rolled out really thin to give a blanket coat. You can of course just fill gaps with Hot Glue if you don’t have anything else. There are a lot more options than just that, but you get the point. So you have fixed the errors of your models with your epoxy or clays and you let it dry, then sand it smooth and sand it again and again and…
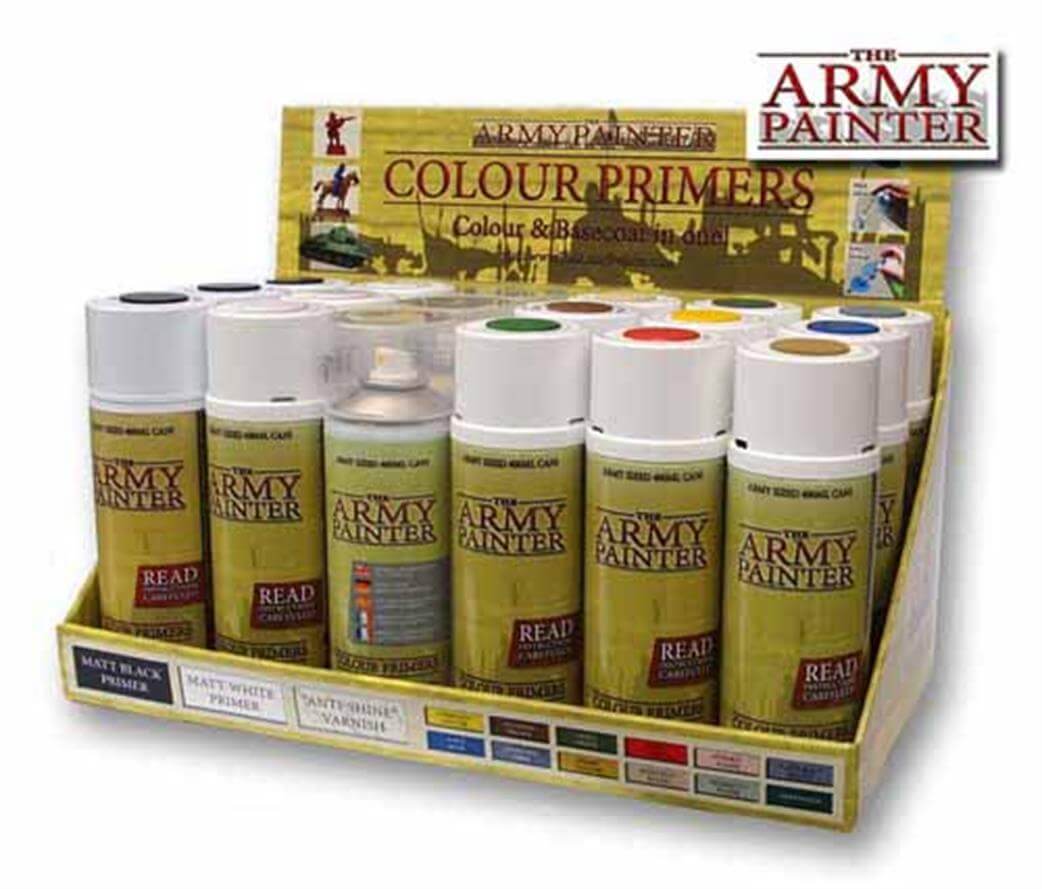
Then you have to prime it. This can be either with a Spray Can (aka Rattle-can) Primer, or with an Air-brush for more detail (more on that in a bit)and it’s not just white primer, some people use grey car primer, you can buy Army Painter Primer for models in Skeleton Bone, Elven Flesh, Matte Black or even Alien Purple depending on what colours you want your figure to end up being and/or what effect you want to get. You can cheat by priming the figure with flesh colours to save having to repaint the skin tones later, just add tones, highlights and shadows to the base layer you apply here. Spraying it black and then spraying a white in one direction gives a ‘Zenithal Effect’, a kind of heavy shadow and helps with the painting in the latter stages.
Then, only then, are you ready to finally paint.
This is where you have so many more choices – of course – You could grab any old paintbrush and a tube of acrylic paint and slap on some basic colours, but why would you waste all that hard work you put into finding, prepping, sanding, and priming your new treasure? The choice is yours of course but really you’re going to want to do this is you can.
Airbrushes;
Ash had a previous Airbrush called the ‘Neat and Handy Compact’, that was anything but neat when it came to cleaning, you’d think he was trying to solve an impossible Maths problem, when it came to reassembling after taking it apart to clean it.

So instead we bought a compact airbrush from eBay (it’s unbranded and has no name so will call it ‘Norris’). In our last project we tried it out. It delivered a great a smooth finish and uses so little paint to cover such a large area, just don’t expect to master it right out of the box! The new airbrush isn’t as compact, with a separate compressor and rubber leads and plugs in to the mains outlet rather than handheld and rechargeable. But it was still remarkably cheap compared to High End Airbrushes at just £40 and are readily available from a number of sellers (probably in China).
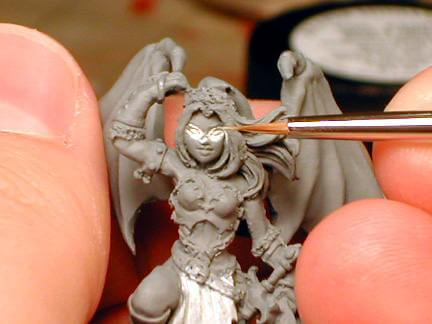
So, with the model together, primed, base layers sprayed, you only have to finish it off with detail painting. This is where you get yourself a Number 00 brush, a Wet Palette, some acrylic washes, highlight paints, contrast paints and texture washes, even paints that make it look like it just survived a zombie apocalypse with grime, rust and mud effects! So start to add your own flare and unique take on the figure.
You can make your little figure look realistic or ‘Other Worldly’ if you want to go that route. There are tons of different makers of paint and types. You can just use Acrylic Paints that artists used to paint pictures, you can make Oil Washes that layer in stages and give great effects and details. Games Workshops have a range of paints in Base, Contrast and Highlight, to paint in their style.

Or go the old fashioned route and use the little pots of Humbrol Enamel Paints and make your home smell like it did when you were a kid painting those Air-fix Planes (no? Just me then?) There a Vallejo’s range of highly pigmented craft paints, or even the Rogue Hobbies Primary Paints that are gorgeously rich in colour and equally expensive. To be fair you could cover your figure in Gold Leaf if you really wanted, the choice is prolific and too many to list in this post – maybe we will come back to that some time!
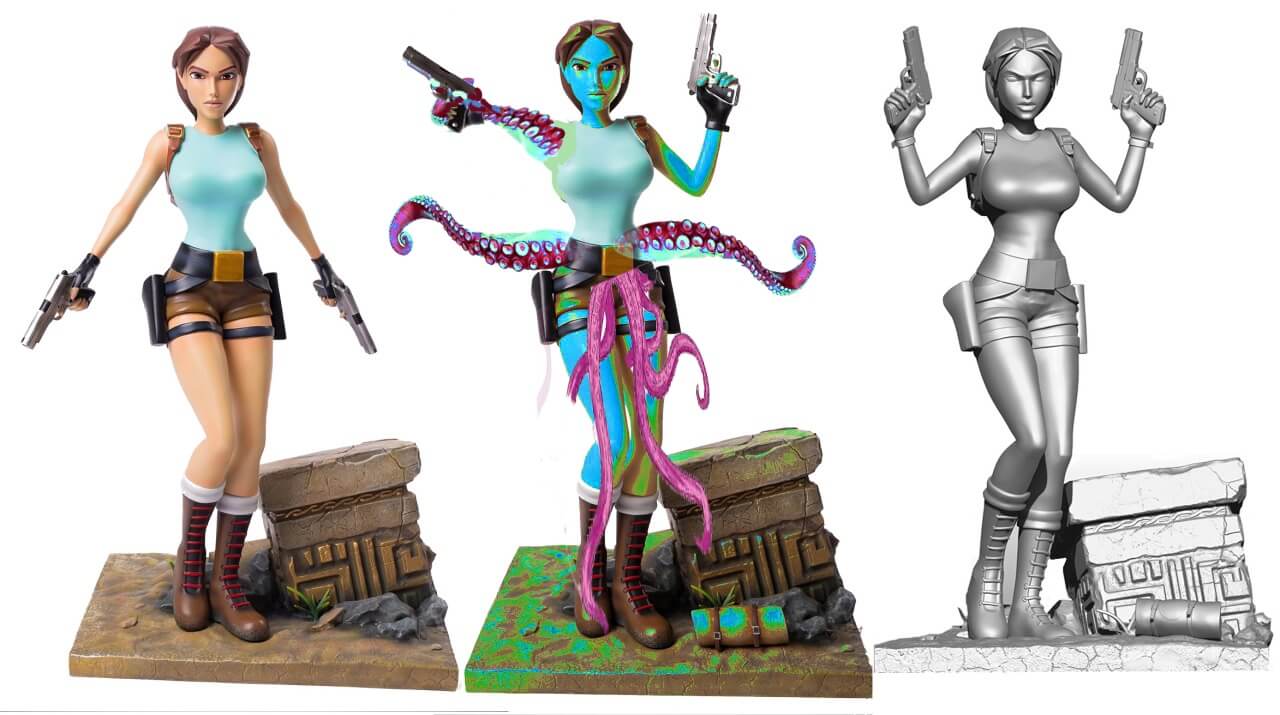
But that is the beauty of this hobby, you can take a figure of Lara Croft – add some tentacles and a laser pistol and paint her blue and end up with something totally off the wall, or you could paint her all silver and give her as an award (Ash’s first figure was a secondhand gold Eagle Female which he stripped back and restored and still has!)
Then it’s just a case of honing your skills, some of these figures, like the D&D and Warhammer are only 28mm tall with so much detail you can spend weeks painting them. 40k armies often rack up to 100’s of individual figures, all hand painted in your own unique colour scheme, in order to identify the group as your own. Painting eyes on the face of a Raging Barbarian or a Green Skinned Orc that is only the size of a USBC Plug is something that can take years to get right and is a skill and a true art.
But if and when you do, then you might want to start painting those figures with a purpose, Every Year there are hundreds of competitions for model painting the most notorious and famous is The Golden Demon, where competitors create literal Mind-Blowing Dioramas and figure paintings that will melt your brains when you realise just how small they are and how long it takes to complete a scene this detailed. (each of these soldiers is barely 1 inch tall!)

Well there you go another figure to add to the collection, all that’s left to do is stick her on the base provided and put her on a shelf. Or you could build your own diorama and make her just a part of a bigger scene, cut out some XPS foam, mould some Sculpey and Foam Clay, build a UV Resin Bath and cure a gallon of toxic resin to make a pool of water effect for your figure to stand in, build trees and landscapes and make it a whole terrain piece of epic scale and then maybe enter it in the next local competition or even the next Golden Demon! – that’s just a thought and maybe something for another post!
But for now, this has been a little insight into one of our ways to pass the time and a look into our ever growing collection of figures. Do you collect figures or statues? Have you ever wanted a model of your favourite Anime Character but never knew they existed? Leave comments and tell us your favoured techniques of painting up your miniatures and figures.
Comments are always welcomed and we will be back soon with another post about something different!

